
Improve your next voiceover or narration in your next video using these 5 simple steps in Audacity
1. Noise reduction
2. Compressor
3. Limiting filter
4. Equalizer
5. Standardize
For more information, see
http://www.1913media.com/
Support me on Patreon – https://www.patreon.com/serge_m
MY BEST FINAL CUT PRO PLUGINS:
Final Cut Pro Essentials Toolkit – https://1913media.sellfy.store/p/fcp-essentials-toolkit/
mTuber 3 – https://motionvfx.sjv.io/LPGr1O
mTitle Kinetic – https://motionvfx.sjv.io/mgBbvZ
MoType 2 – https://fxfactory.pxf.io/motype2
AddMotion – https://xfactory.pxf.io/eK46BQ
mTitre Pop – https://motionvfx.sjv.io/4eN5a0
Keyper – https://fxfactory.pxf.io/75yxbd
SERVICES I USE TO MAKE VIDEOS
Artlist.io – https://bit.ly/3jrKmuj
Envato Items: https://1.envato.market/53AkL
Download Audacity for free – https://www.audacityteam.org
Voice off
While not ideal for every video, a voiceover can be a perfect element to add to your next project. If you're making an educational video or product, you're probably using voiceovers. But even if your project is a family outing video, a vacation video, or even a montage, a good voiceover can be a perfect element that elevates your video from good to great. Or at the very least, clarify a confusing video.
Recording voiceovers can be an art in itself, requiring professional equipment, recording studios and time to make it perfect. But voiceovers can also be recorded at home, with minimal equipment and funding. Technically, all you need is a microphone and a way to capture and record audio. To start, I would recommend a good USB microphone, such as the Blue Yeti, that plugs directly into your computer, and a way to capture audio to your computer. Personally, I prefer to use Audacity, but you can also use FCPX, Premiere Pro, or one of the many other apps available to you.
An alternative to using a USB microphone is to use a separate audio recorder, such as the very affordable Zoom H1, or at the very least, a mic designed to work with a smartphone. All of these options will provide a much better result than the built-in microphone on your computer or camera.
Another very important element of recording a voiceover is your space. The room you record your voiceover in can greatly affect the quality of your audio. Try using a space with lots of sound-absorbing materials, such as rugs, upholstered furniture, pillows, etc. Anything that prevents sound waves from bouncing around, which can create reverberation or echoes. A nearly full closet or even your car can work great for this. You can also place an acoustic panel behind your mic to absorb sound waves and improve your sound quality.
A good quality recording is the most important part of recording a voiceover. Apart from this, there are a number of steps you can apply in post-production to improve the quality of your audio. The following five steps are intended to improve a good recording. They are NOT intended to repair a poor quality recording. Remember that if you start with a poor quality recording, no amount of effects will fix the problem, so a good quality recording should be your main goal.
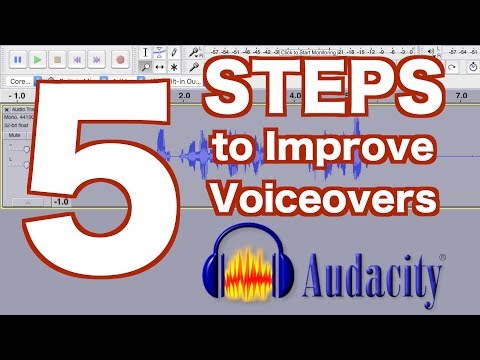
5 Post-Production Steps to Improve Your Voiceover
The following five steps will help you improve your voiceover recording. These five steps are demonstrated in Audacity, but the same principles can be applied in other programs as well.
Step One – Noise Reduction
Noise reduction can reduce constant background noise such as buzzing, buzzing and hissing, which was not or could not be eliminated before recording. It is not suitable for individual clicks and pops, or irregular background noises such as those from traffic or an audience.
Second stage – Compressor
The compressor effect reduces the dynamic range of your audio by compressing or attenuating the loudest parts. This allows your audio to be amplified without clipping the loudest passages.
Third stage – Limiter filter
While the compressor effect is used to compress the loudest parts of your recording, the limiter filter focuses more on amplifying the quieter part rather than the louder parts.
Step Four – Equalizer
Equalization is a way of manipulating sounds by frequency. It allows you to increase the volume of certain frequencies and reduce others. There is NO right way to EQ a voiceover clip, but there is definitely a wrong way. Everyone's voice is different, so there is no standard way to equalize voice.
Step Five – Normalize
Audio normalization applies a constant amount of gain to the audio recording to bring the maximum amplitude to a target level. This should always be the last step in your audio workflow for the effect to work properly. Without the dynamic compression achieved with the compressor effect and limiter filter, the peaks in your waveform would prevent enough gain from being applied to the softer passages.
Please take the opportunity to connect and share this video with your friends and family if you find it useful.


